Saturday 27 April 2013

Day 15 (21) - All Quiet on the Westwood Green Front

I'm not exactly sure where we'd be on the build after three weeks of work, but the last week has been somewhat of a "non week". At the end of last week, we were a day away from having the brickies in to start the interior concrete block work and exterior brickwork to both the ground floor side extension and the front porch. The foundations had been excavated and prepared and the concrete had been ordered.
We were asked to choose the type of brick we wanted for the front and side of the house as this had to be as close a match as possible to the existing brickwork in order for it not to look like a patchwork quilt. The rear of the house would be more straightforward as the brick used for the existing ground floor extension, "Heather" was a type easily available.
However, of the shortlisted two samples of brick for the front and side, the nearest match we were told, had a 10 week waitlist before they could deliver. Needless to say, we instructed our builders to forge ahead with ordering option B.


We wanted the bricks on the left but have to go with the ones on the right

So, in terms of work done in the last 5 days:
  • Building Inspector approved soakaway and concrete slab for WC & Utility Room
  • Back-filling of soakaway
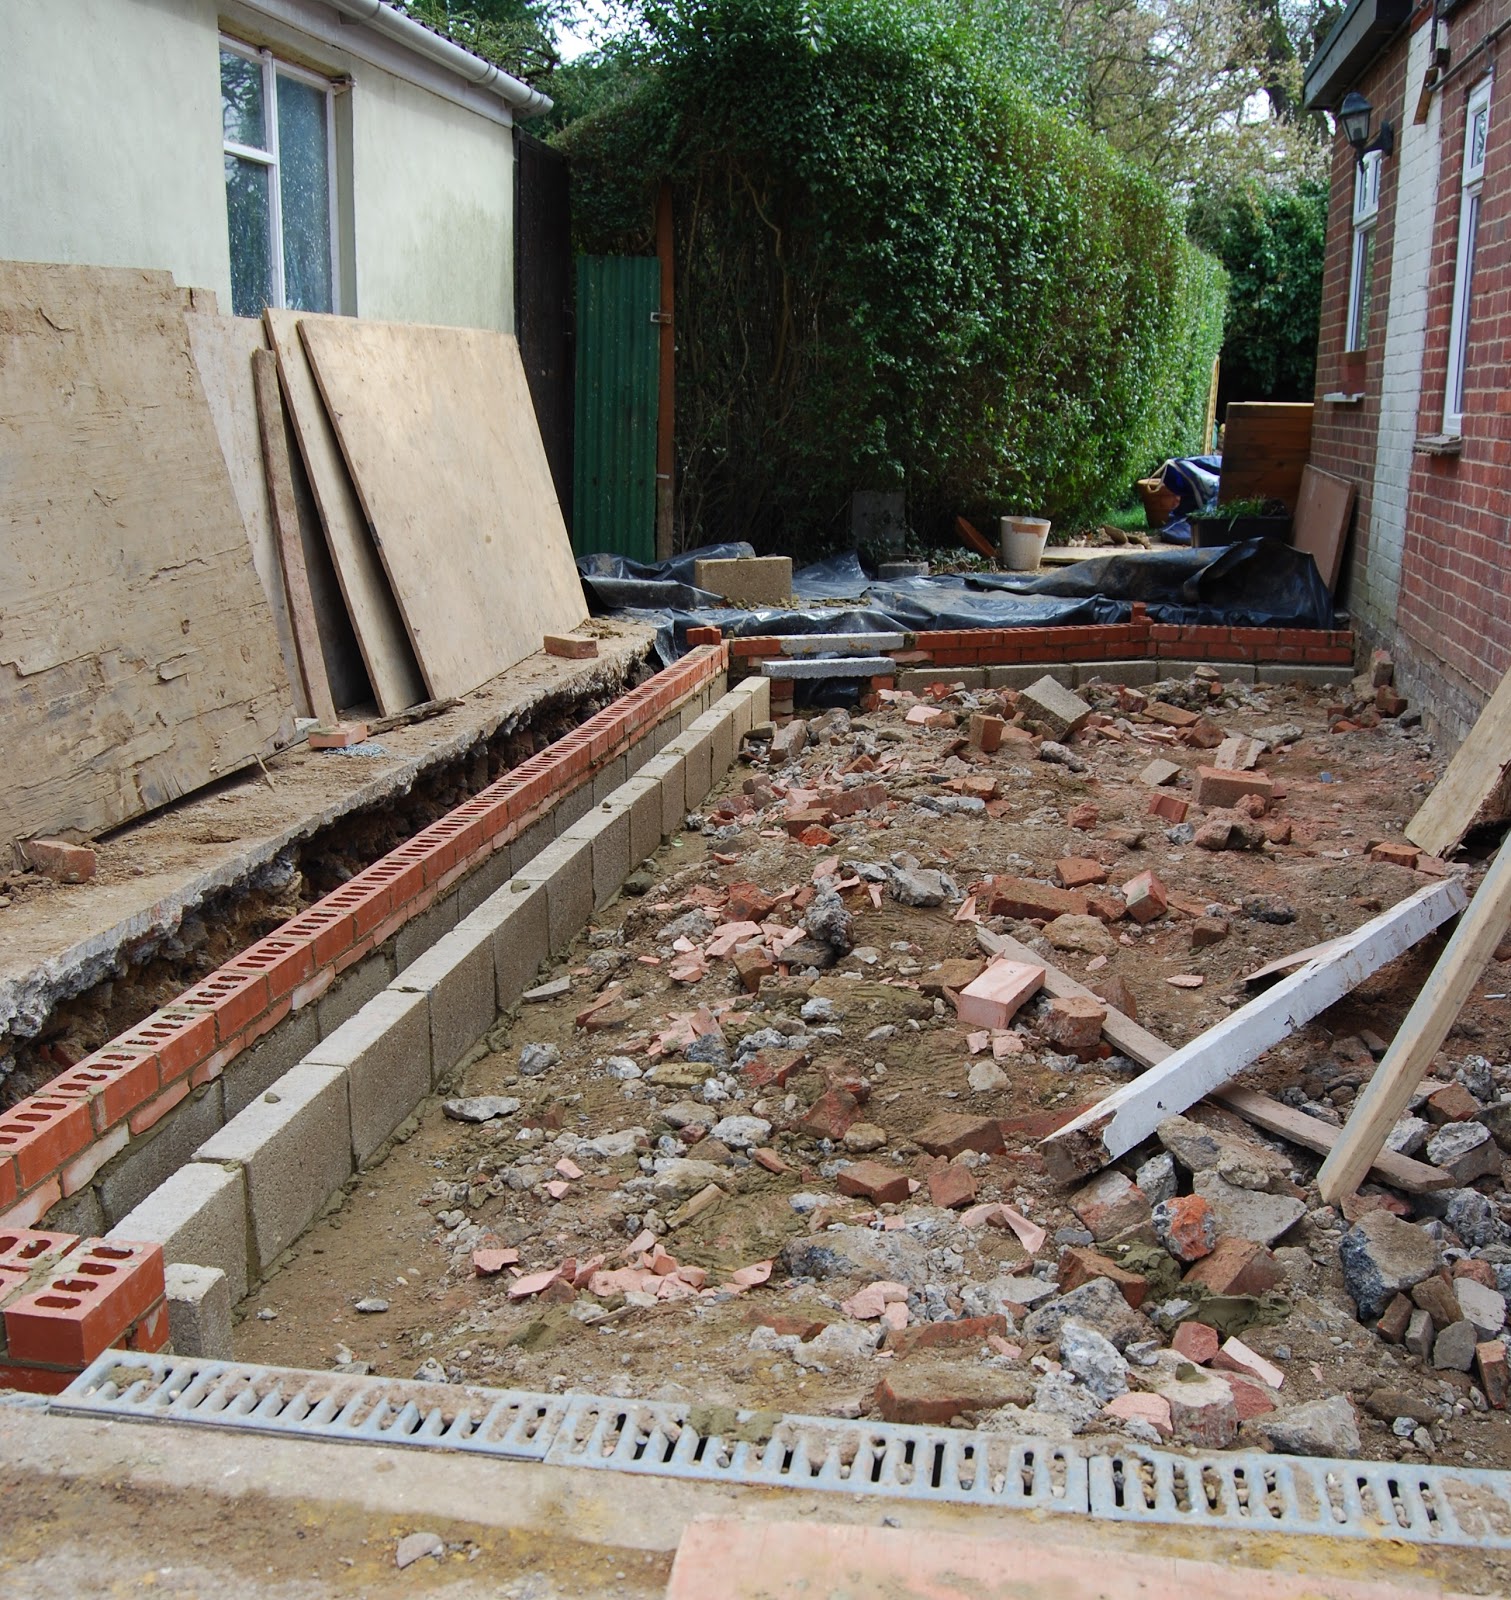
  • Laying of brickwork up to DPC level
  •  Laying of concrete slab for garage
Soakaway filled in using soil from rear left corner which will be levelled


Callum and his infamous "Hardcore Jig". Steve's not impressed

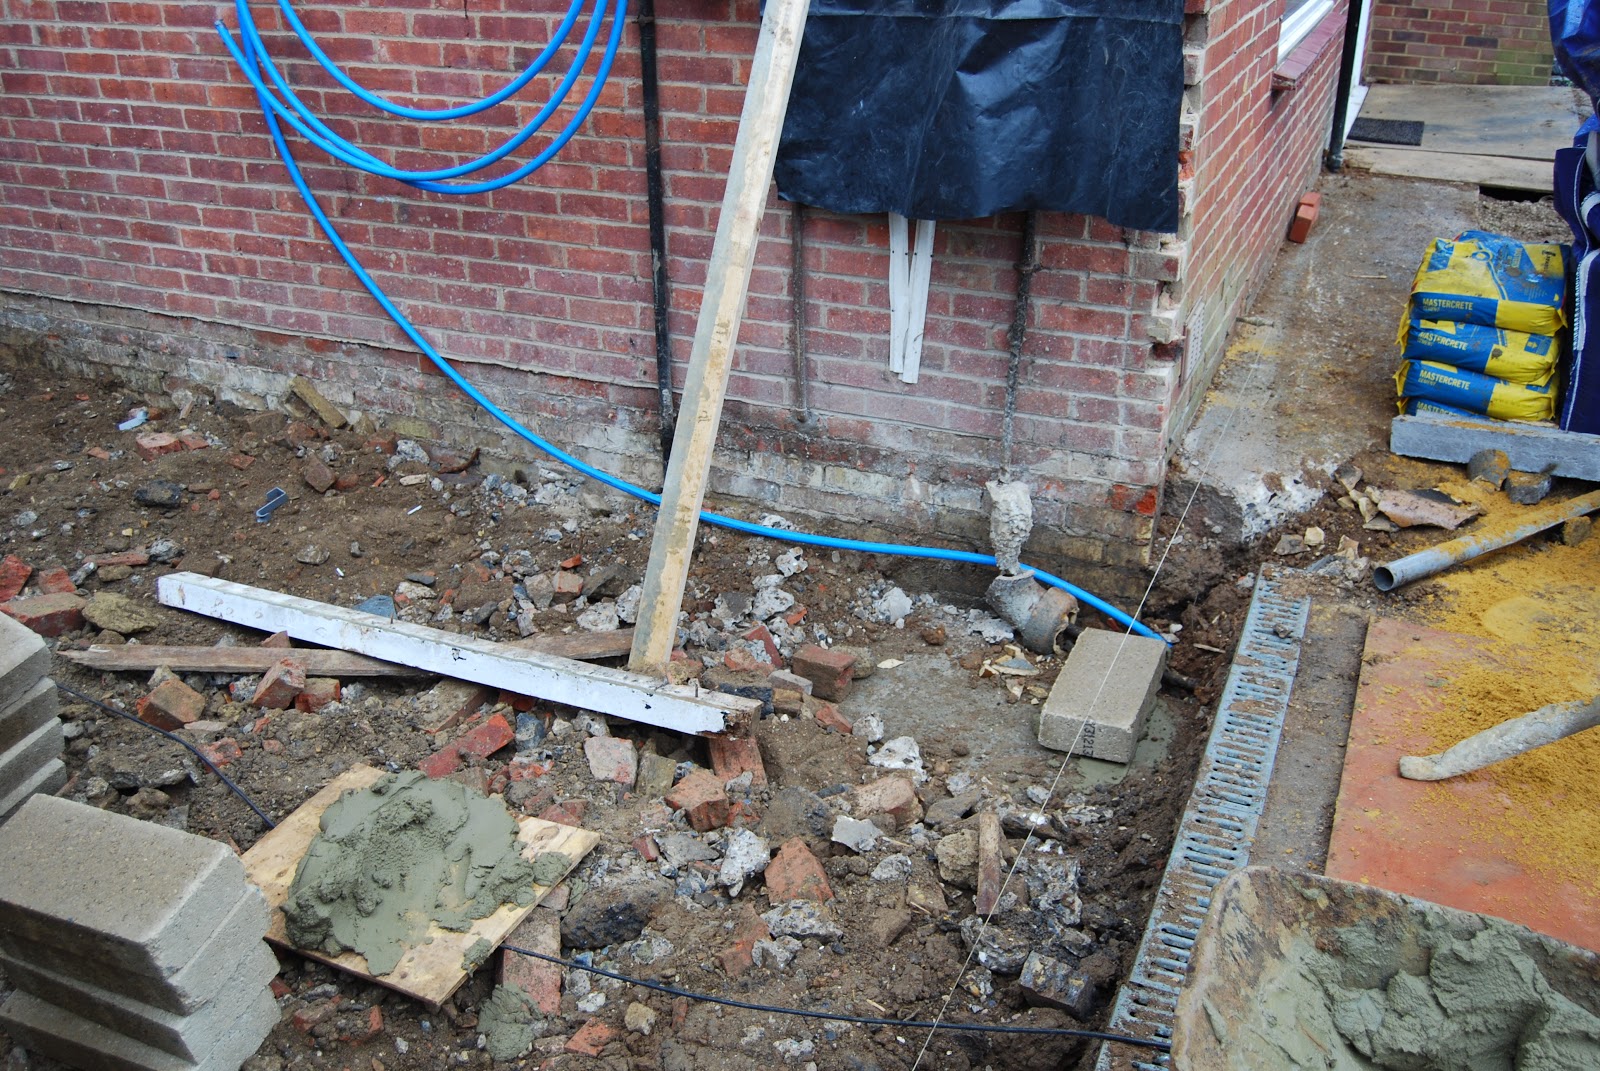
Garage floor with DPM laid, layer of builders sand and steel mesh ready to receive concrete.
New water supply pipe (blue, top left) has been re-sited to the garage
(currently under kitchen sink)

The finished product.
(Note the plywood screening to deter cats from leaving their marks again!)

Our builders have informed us that the bricks should be delivered on Tuesday 30th April so hopefully the rain will stay away for the start of the bricklaying.

We really don't need any more delays.

More next week.


Saturday 20 April 2013

Day 10 (14) - No Room For Leonard Rossiter On This Build

Today was scheduled to be Callum and Steve's last day on site to complete, as Callum so eloquently put it, "the mucky stuff".
In reality, they would have to come back on Monday to complete the laying of the garage concrete floor.
For now, they would have to crack on with laying down the hardcore on top of the rubble in the area which will become the floor of the WC and utility room.
This was then all compacted down before covering with a layer of builders sand which would provide a smooth even surface on which to lay the Damp Proof Membrane (DPM). The DPM, as the name suggests, provides a non-permeable barrier against any moisture in the ground coming through into the concrete which in the long term could cause degradation and cracking of the floor and walls, otherwise known as Rising Damp (not to be confused with the classic 70's sitcom starring Leonard Rossiter).


Callum laying out the steel mesh on the supports on top of the DPM


Once the DMP was laid out, steel mesh was measured out and cut to size so that it could fit within the area to be concreted. This was wired together and also connected to the existing foundations of the house using steel rods.
The steel mesh is supported by small plastic cones which keep the steel suspended above the DPM so that when the concrete is poured in, the mesh will be embedded within the solid concrete.


Would you believe this man is powered purely by tea?
Once all the concrete had been mixed (by Steve) and poured by hand (Callum) it was levelled off using a long piece of 4x2 timber to give a smooth surface.

Roughly 20 barrows worth of concrete later...

And then after much mixing, pouring, wheeling, more pouring and levelling...


The finished product
 Well, the photo above shows you what it should have looked like once it had set overnight. Unfortunately, Daisy (one of our cats) had other ideas...


Daisy's contribution to the build. Could have been worse, she could have got stuck there!
Thankfully, the paw prints won't be visible as it will first be screeded before then being tiled, but that stage is way off.

Monday will see the garage floor being poured and the soakaway in the garden being back-filled and Callum & Steve's last day on site.

Now to enjoy the sunshine and a spot of lunch.

Thursday 18 April 2013

Day 9 (11) - The Digging is Never Done

Just when you thought there was no more digging to be done, especially as the mini-excavator and dumper were collected by the hire company yesterday. Callum and Steve were back on site this morning to dig out the last remaining trench for the soil pipe coming in from the downstairs WC and Utility Room to connect to the inspection chamber. Needles to say, digging it out the old fashioned way i.e. by hand with a pick and shovel, takes a little longer but at least it's eco-friendly. Although there's still some energy consumption as the boys run on tea and coffee...and that involves a kettle boiling some water.
Anyway, it's minimal.
The hole for the inspection chamber also had to be dug out and this would be located right in the middle of the existing communal sewer pipe which runs along the back of every house. The challenge here is cutting into the pipe whilst avoiding "black water" leakage into the hole. As mentioned in a previous post, this "black water" could be anything ranging from water from the washing machine or dishwasher to water coming from the toilet and all the nasties that come with it. You know what I'm talking about so I won't expand on it.

In the photo below you can seethe hole exposing the the existing sewer pipe and Callum cutting out a section of it to accommodate the inspection chamber

Callum cutting in to the "poo pipe"
 After the required section was removed, the inspection chamber was connected using rubber Clay Pipe to PVCU adaptors


Section removed and no "little brown fish" in sight...thankfully
The inspection chamber, once in place was then supported with a dry cement mix which aided the levelling and will also draw out any moisture in the ground and then set hard. If wet cement was used it would then remain wet and not set properly.

Inspection chamber, level and in place. Job done!
Tomorrow will see the concrete poured in to the garage floor and all the remaining trenches and soakaway back filled and levelled out again. Roll on Friday morning!

Wednesday 17 April 2013

Day 8 (10) - The 'Brickies' have arrived

Although a short day relatively speaking, today was an important day. For today the bricks and bricklayers arrived on site.
Sean and Aidy arrived just after 7.15am and after the obligatory supply of teas (milk & 3 sugars for Sean and milk & 1 sugar for Aidy) they had a quick look over of the site and the architect's drawings.
They then set up the surveying equipment to make sure they laid the bricks straight and in the right place in relation to the existing building.


Laser Level (Aidy in the background)

The blocks, bricks, cement and sand for this stage had already been delivered the previous day so all that was left to do was unload the cement mixer and start laying the bricks

 
Engineering bricks

As you can see in the image below, the concrete blocks are laid on top of the concrete foundations topped off with a course and a half of the engineering bricks to bring it to the damp proof course (DPC) level. The gap in between is for insulation. the same was laid at the front of the house in preparation for building the porch.

Bricks laid to DPC level

Detail showing gap through which soil pipe will pass through
 As all the heavy excavation work, the mini-excavator and dumper were taken away leaving a bit more space on our drive for the arrival of the bricks...once we can decide on which type to go for.

Ready and waiting for some hardcore action
The challenge we have with the brickwork is that we have to match the existing bricks as best we can; this is a condition of being granted planning. However, the house was built in 1954 and as you can appreciate, measurements were still carried out in imperial units e.g. inches, feet, yards as opposed to metric mm, cm, metre etc. 
So not only is it difficult to get your hands on inexpensive imperial sized bricks these days, but the few places you can get them only offer 2 or three types of brick, none of which are a carbon copy of the existing bricks.
The new bricks will also contrast for the first few years with the weathered, slightly darker bricks on display. Whichever ones we choose, it'll be noticeable.

More news on this tomorrow when we get the samples.

Day 7 (9) - Foundations and other stuff

It was a busy day at the office yesterday (Day 7 - Tuesday) with no time to take any photos or write a detailed blog.
In summary though, Callum and Steve laid the new supply pipe from the water main which will now run diagonally accross the front garden to the corner of the new garage to run alongside the existing gas and eletricity supplies.


Front garden showing new supply pipe. The existing stop-valve is located under the square paving slab in the foreground

New water supply pipe exiting corner of house alongside other utilities
They then removed what was left of the old garage floor, levelled it out and then back-filled with rubble. Once the three courses of engineering bricks are laid, hardcore will be filled in, followed by sand and then a waterproof membrane. Steel mesh will then be placed within this space and tied in to the existing house and then concrete poured in on top to create the new slab and new foundations for the side extension.

I hope to take a few photos later on today to show the progress of the brickwork.

"Character is like the foundations of a house - it's below the surface", Anon

Monday 15 April 2013

Day 6 (8) - Concrete, tree stumps and an escaped dog

After the break over the weekend, it was back to normal this morning.
Darran, Callum and Steve were out on the site after their morning brews, removing the shoring from the 2 trenches and readying them for the delivery of the concrete for the foundations.

The concrete, once set, will provide the base upon which the bricklayers will start to build upon, The concrete was delivered by Master Concrete which delivers concrete in a Volumetric Concrete Mixer (VCM). As opposed to the old fashioned Drum Mixers, a VCM delivers the ingredients (water, ballast, cement powder) seperately and mixes them as they are poured out on site. In this way, you only pay for what you use and you don't incur any "un-carried" charges (the charge for unused, mixed concrete being returned and disposed of).

The 45 tonne beast
Our delivery was the maximum 9m3 which is poured out at a rate of 1m3 of concrete per minute.

Water, ballast and cement - easy as A,B,C
Before long, the porch and side extension foundations had been laid and covered over with plywood so as to protect it from any adventurous cats (although Eddie did manage to get out via the back garden, run out on the Green opposite our house, and give Callum the run around before baing brough back in.
The concrete will set overnight, ready for the bricklayers to start their job beginning with a few courses of engineering bricks.


Steve & Callum supervise the flow


Out at the front of the house, the smaller trench for the porch was also filled and the guys took advantage of having the mini-excavator to dig out the trench for the new water supply pipe and remove the tree stumps of a birch and beech tree to allow us to lay turf once the build is finished.

That's it for now.

Hasta mañana!

Saturday 13 April 2013

Day 5 - Four Seasons In One Day

The day began in a similar vein to that of the previous day; wet.
Waking up to a sodden and grey Friday morning was not what I had expected if the media meteorologists were to be believed. The previous day's less than spring like weather was still well and truly with us. In fact it was was sat down in the local saloon, feet up on the table, casually sipping whiskey from a shot glass showing no signs of leaving town anytime soon. 

Okay, so maybe this extended winter is starting to get to me...just a tad.

Let's not forget that because the weather in February and March had been so bad (the worst since records began), that our builder's other jobs had been delayed by 3-4 weeks , which in turn had delayed the start of our job by 2 weeks. Theoretically, if we had started on the 25th March as was intended, we'd have foundations laid, and a fair amount of brickwork completed already...possibly even a new porch.

The reality though is that the guys have made good progress in the last

Anyhoo...the lads turned up at 7:45am I had their tea and coffee ready for them and by 8am they continued from where they left off the previous day. Digging up concrete and the earth/hardcore/assorted landfill that lies beneath, is never a nice job; even less so when it's pelting down with rain. But someone's got to do it. I was told this part would take a little longer as they were having to be relatively delicate with their excavating as to avoid digging through any of the utilities; water, gas and electrical supplies. This took the best  part of the morning and numerous refills of coffee and tea. During this time, the rain eased off and the sun had come out. It then went back into hiding and it started raining again. This happened pretty much all through the day. Needless to say, having a lot of clay-rich earth being dug up, mixing with rain and then having two cats casually coming in and out of the house as they please, was taking its toll on our parquet flooring.

Guilty Tim
Another skip full of rubble and earth was taken off site and the trench was dug at the front of the house which will be filled with concrete to provide the foundations for the porch. This also took a while as the water supply from the main ran directly under the front door, under the hall and into the kitchen. This will be cut off and a new supply routed directly into the garage where the new combo-boiler and megaflow storage cylinder will be sited.

Trench dug out for the porch footings.
The pipe in the foreground is the current water supply.
Once all the "fiddly digging" was done the boys were able to crack on with digging out the remaining soil and then shoring up the trenches so that any further rain wouldn't cause cave-ins.

Monday should see the delivery and pouring of the concrete and perhaps the first laying of bricks on Tuesday (weather permitting).

That's it for now. Time to walk the dog.

By the way, it's raining.

Thursday 11 April 2013

Day 4 - The sun has got his hat on...well, not quite

So, after a night of torrential rain, we avoided having the trenches filled with too much rainwater and so the excavation continued.

No hidden treasure or remains of past British monarchs

As I mentioned in my previous post, the day was going to be slow in terms of progress as there was so much concrete to cut away, dig up and remove, but once Callum and Steve (a.k.a. Bess) got into their stride (and many cups of tea and coffee later) we had a finished product.

Cutting away concrete channel to allow for excavation

Regarding the design issue of the drainage, it seems that this will have a knock-on effect on the design of the floor joists above the garage as the soil stack needs to be located internally now. This in itself wouldn't be too big a deal but because the soil stack branch (where the toilet, bath and basin waste connect into) has to be lower than the level of the pipes that feed into it, it means that it would be right in the space where the floor joists would be. As a result, the floor joists would need to run north-south as opposed to east-west which means that the calculations for the steel beams upon which the floor joists are laid, need to be looked at again to make sure the flitch beam I talked about would be sufficient to bear the load. So this means getting the Structural engineer to get his calculator out, do a few sums and charge us £300 for the outcome. More money :-(

Anyway, I'm waiting for our architect to get back to me to see if she has any design ideas that could avert all of the above, hopefully sooner rather than later.

The finished product
Tomorrow they'll be digging out the ground for the front porch, pouring concrete for the footings to the side extension and then pulling up the existing concrete floor of the garage to make way for the new concrete slab.

Hopefully no more rain either...please.

Day 3 - An Inspector Calls

A warmer start to the morning and lots to be getting on with. The plan for the day was to finish digging out the trenches for the drainage leading into the soakaway and also to expose the foundations on the corner of the existing rear extension so that the Building Inspector could give it the once over.

This would be a critical moment early on in the build as it could potentially add £1000's to the budget if the existing foundations have to be underpinned and strengthened, not to mention a delay in the schedule.
Thankfully, the sun was shining on us, and the Building Inspector said the footings were fine and we were OK to carry on. However, he did have concerns regarding (a) the drainage layout at the side of the house and (b) the strength of the floor joists above the garage. 

Ground Floor Plan


After a bit of head scratching and discussion  we came up with a good alternative for the drains which thanks to the good will of our contractors, will only add an additional £350 and regarding the floor joists, the potential "weak" spot in the stud wall dividing the garage from the WC, could be strengthened with a flitch beam as shown in the diagram below:

Flitch Beam - timber joists sandwiching a steel plate and bolted together
The digging out of the drainage trench to the left of the garage (what will be the alleyway between our house and our neighbour's) will take a fair bit of time as it's concrete which needs to be broken up with a pneumatic breaker. It'll also be fairly deep and will have to be shored up by plywood sheets supported by lengths of 4x2 timber.

It'll be a busy and undoubtedly noisy day tomorrow!

Tuesday 9 April 2013

Day 2 - Groundworks

Ok, so not a great start to the morning. Wet. Cold. Windy.
Still, at least it's not snowing.

Darran arrived ahead of Callum and Steve as he wanted to discuss the re-location of the soil stack which had been sited by our architect on the side of the extension. For the uninitiated, the soil stack is the large plastic pipe which takes away "black water" waste from your bathroom and into the sewer system. Our architect had cleverly designed for the new downstairs WC, utility room, new fmily bathroom and new en-suite bathroom all to be located in the new side extension.
Unfortunately, current planning regulations require any extensions above the ground floor to be at least 1 metre from the party wall (boundary between your property and your neighbours). In our case it means that we aren't able to go straight up above the garage but instead have to come in approximately 600mm. As a result, the soil stack would be coming through the flat roof part of the  new garage and then affixed to the exterior wall of the 1st floor. On the face of it, it's no big deal, but this would become a "weak spot" for any potential leaks and the ingress of water into the ceiling cavity of the garage/WC/utility room. So after consulting with Darran, we've decided to have the soil stack sited within the main bathroom and boxed in. Panic over.

Callum and Steve arrived shortly afterwards armed with mini excavator and dumpster which would speed up the work of digging out the hole for the soakaway. What's a soakaway you ask? A soakaway can be as simple as a hole in the ground filled with rubble and coarse stone with a drainage pipe laid to it in order to disperse the rainwater. Its not rocket science, and again, it will be constructed to the specifications laid down by the Building Inspector.


Digging out the soakaway
 The soakaway will take up the rainwater from the roofs of the rear extension and that of the side extension. Thankfully, the rain stopped after a couple of hours, averting our back garden from resembling the trenches of WW1.
Tomorrow the Building Inspector will come to give his approval for the soakaway and also look at the foundations of the existing ground floor extension to see if they are sufficient to support the additional 1st floor.

D-Day! Day 1

After what seems like an eternity, our build (or rather our demolition) has started in earnest.
Darran, Callum and Steve arrived yesterday (Monday)morning just after 7.30am to begin clearing the site ready for the excavation of new foundations for the replacement garage and side extension. After getting the tea and coffee orders sorted out (whatever happened to the good old 'builders brew' of tea with milk and 2 sugars?), the lads got stuck into razing our existing garage down to the floor.
There were also a few electrical issues which needed seeing to as well as weatherproofing our consumer unit and electric and gas meters. After a hard day's graft, this is the finished result after day 1:
Only the garage door frane left in place


Current window will be replaced by door into WC & Utility room


The first skipload of rubble aka the garage

Tomorrow will see the excavation of the garage floor and digging out the trench for the drainage. Let's hope the rain stays away!

Sunday 7 April 2013

D-Day minus 1

So, the easterly wind that has been extending the winter has finally blown away and the sun has once again been shining brightly in the Spring sky. A great opportunity to finish off the final bit of clearing up before the professionals arrive on site tomorrow morning to start the job properly. It'll be strange returning home after work to find our garage gone. A structure that has been standing for the best part of 60 years but alas, not practical as space to keep a 21st century automobile in. The new garage will have the function of workshop and storage room once complete and will be slightly smaller due to the current building regulations insulation requirements, but also due to the fact that it will house our new combination boiler and megaflow as well as a WC and utility room.
Looking at the state it's in now, it's quite difficult to imagine what the finished product will look like:


Original garage minus roof. Note the original thickness of the wall, only one course thick.
 The challenge we had to overcome was making sure the garden was escape proof for our dog Eddie and this proved easier than originally thought thanks to a leftover piece of chipboard which coincidentally spans the opening left at the back of the house once the garage has been removed.

The last remaining bits and pieces from the garage have been boxed away
and thankfully all our animals are accounted for:

No animals were harmed in the taking of this photo
 So, early start tomorrow so let's hope it doesn't rain!

Friday 5 April 2013

D-Day minus 3

So, after almost two years of planning and saving up, D-Day (D for demolition) is almost upon us. Strictly speaking, the demolition began today with the removal of the corrugated, asbestos-cement roof from the garage. As asbestos is a potentially harmful material if not properly handled, we had to use the services of a specialist asbestos removal/abatement company licensed to legally dispose of it.
A two man crew arrived shortly after 10.30am and were out by 11.45am with all the offending material appropriately wrapped, sealed and removed from site.
Job done.

Roll on Monday morning and Demolition Day!